A guide to charging your Nissan Leaf
Electric vehicles (EVs) are becoming increasingly popular, and the Nissan Leaf is one of the most well-known and widely adopted electric cars on the market.
If you're new to EVs or simply want to learn how to charge your Nissan Leaf, you've come to the right place.
In this step-by-step guide, we’ll walk you through the process of charging your Nissan Leaf, whether you’re using a public charging station or setting up a charging station at home. By the end of this guide, you’ll feel confident and equipped to keep your Nissan Leaf powered up for your next adventure!
Step 1: Find a charging station
If you don’t already have an EV charger installed at home, look for public charging stations in your area. You can use various mobile apps or websites to locate them. Charging stations can often be found in car parks, shopping centres, or along major roads.
Step 2: Check the charging station compatibility
Make sure the charging station is compatible with the Nissan Leaf. Most charging stations support the standard Type 2 charging connector used by the Leaf.
Step 3: Park your Nissan Leaf
Once you’ve found a compatible charging station, park your Nissan Leaf close enough to connect the charging cable.
Ensure your Leaf is properly positioned and in park (P) mode. Set the parking brake for added safety.
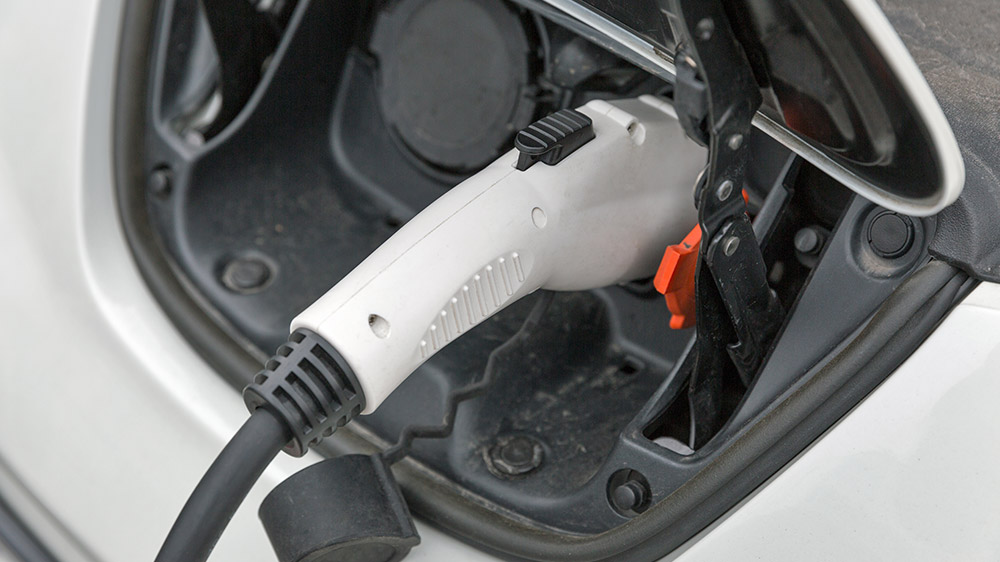
Step 4: Open the charging port
Locate the charging port on your Nissan Leaf. It will be located on the front of the vehicle, behind a small door or flap. Press the button or release lever near the charging port to open it.
Step 5: Connect the charging cable
Take the charging cable from the charging station and connect it to the charging port on your Leaf. Insert the cable’s connector into the charging port until you hear a click or feel it securely lock in place.
Step 6: Start the charging process
On the charging station, you may need to authenticate yourself using a membership card, mobile app, or by following the on-screen instructions. Once authenticated, start the charging process. Some charging stations have a start button, while others may automatically start charging after connection.
Step 7: Monitor the charging progress
Your Nissan Leaf may have an indicator light on the dashboard or near the charging port that shows the charging progress. Alternatively, some charging stations have a display screen that shows the charging status and elapsed time.
Step 8: Wait for charging completion
The time it takes to fully charge your Nissan Leaf depends on the battery’s current level and the charging station’s power output. Charging times can range from a few minutes for a quick top-up to several hours for a full charge. You can occupy yourself with other activities while waiting.
Step 9: Disconnect the charging cable
Once the charging is complete, safely disconnect the charging cable from your Nissan Leaf. To do this, press the release button or lever near the charging port to unlock the connector, and gently remove it.
Step 10: Close the charging port
Close the charging port door on your Nissan Leaf. Ensure it is securely closed to protect the port from dirt and debris.
Congratulations! You’ve successfully charged your Nissan Leaf. Remember to unplug the cable from the charging station if there are no instructions to leave it connected. Charging your Leaf regularly will ensure you have enough battery power for your future journeys.
Contact EVC Electrical Installations
As electric vehicles continue to gain traction, charging infrastructure is rapidly expanding, making it easier than ever to keep your Nissan Leaf fully charged and ready for the road. If you’re interested in a home EV charger installation, we can help! Just give us a call on 01322 761101.